


1. Locate the Clipping pane:
It is the pane with a desert-island icon.
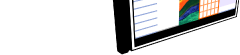
2. Load your image:
- Click on the rotating star, and import your image using the dialogue box.
3. Edit the caption of the image:
- Click on the caption, and begin typing.
- You can copy the caption to the Contents pane by right clicking on the Clipping Caption, and selecting "Copy to tree caption".
- You can copy the caption from the Contents pane by doing the same and selecting "Set from tree caption".
4. (optional) Apply effects to the image:
Simply click on the toolbar buttons:
- Colour filters: greyscale and sepia;
- Rotation: 90 degrees rotations;
- Flips: horizontal and vertical;
- Colour palette: for the background of the image, and the text.
5. (optional) To remove an image...
Right-click on the image and select "Remove Image".
A Quick Note About Saved Images
K-Pad does not modify your original image files one bit.
Neither does it embed the files in the saved .kpd document.
The filters are applied on-the-fly, since that does not take a massive amount of processing time, and it does not eat up disk-space.
Re-saving .jpg files decreases their quality, which is why K-Pad doesn't.
As files are linked, not embedded: if you are moving .kpd files to another computer, you should also remember to move your image files too! They do not have to be moved to exactly the same folder; in the same folder of the .kpd file (or a subfolder) will do.
 About K-Pad
 Screenshots
 Download
 What's New
 Setting up a New Project
 Booklet Sizes
 Creating a Text Project
 Headers and Footers
 Contents Pane
 Clipping Module
 Squared Paper Module
 Preview and Printing
.png)

No comments:
Post a Comment